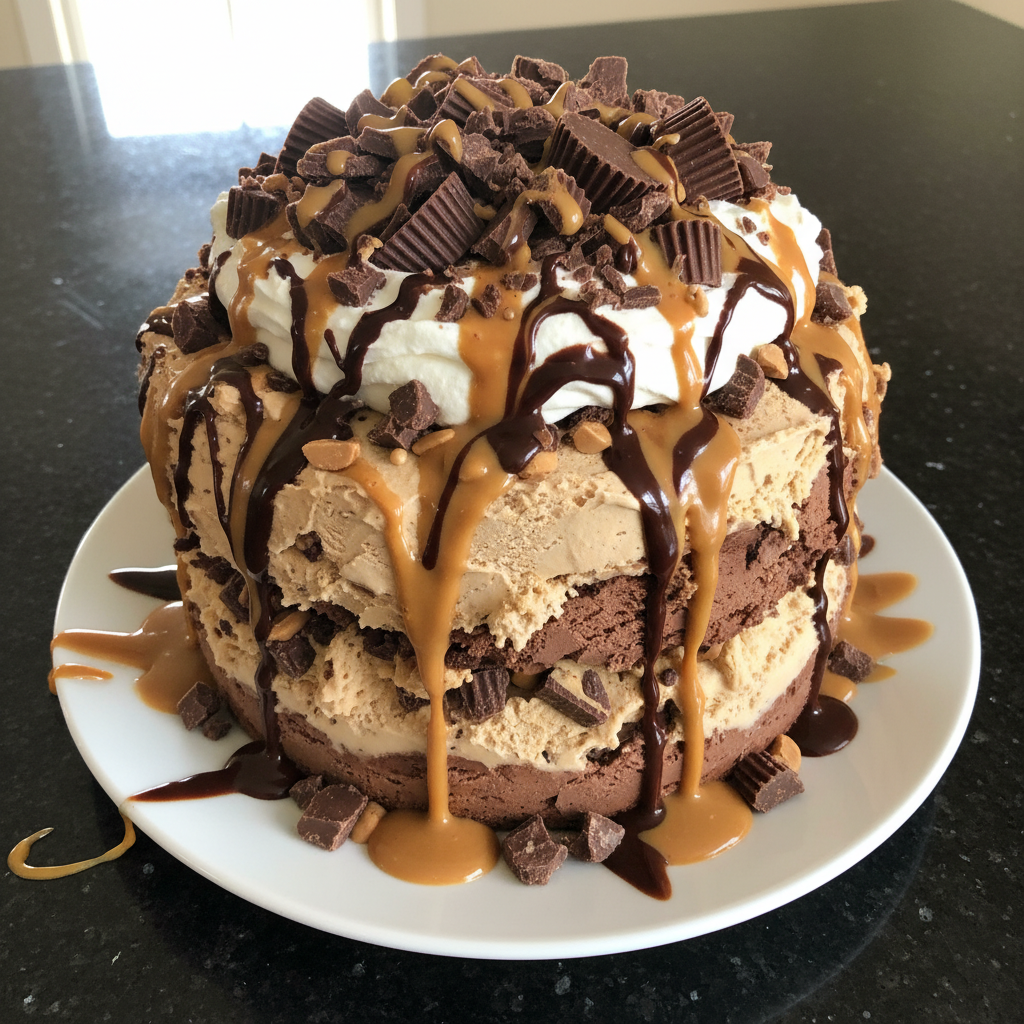
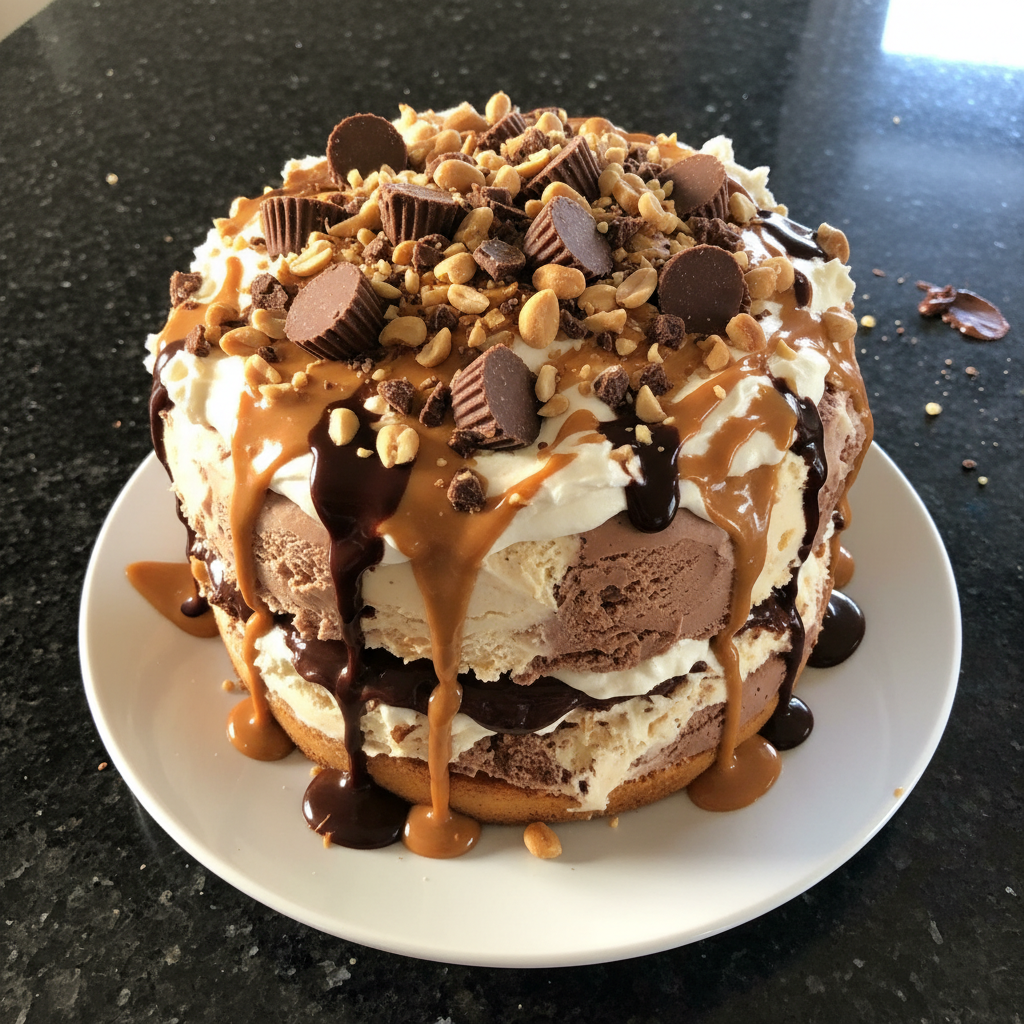
Luscious Reese's Ice Cream Cake
Highlighted under: Creative Sweet Recipe Ideas
I absolutely love making this Luscious Reese's Ice Cream Cake during warm summer days or for special gatherings. It's a delightful blend of rich chocolate and creamy peanut butter flavors that everyone adores. The best part is how simple it is to whip up this dessert with just a few ingredients, leaving me plenty of time to relax and enjoy with friends and family. Trust me, once you try a slice, you’ll understand why this cake has become a staple in my home!
When I first baked this Luscious Reese's Ice Cream Cake, I was amazed by how effortlessly it combined my favorite flavors into one decadent treat. I remember spending time experimenting with the perfect balance of chocolate and peanut butter. Finally, I nailed it when I used a chocolate cookie crust, which adds a delightful crunch that compliments the creamy ice cream.
As I served the cake at a family gathering, I saw everyone’s faces light up with joy. The secret is letting the cake freeze long enough—at least two hours—before slicing it, ensuring each piece holds its shape while remaining irresistibly creamy and smooth.
Why You'll Love This Recipe
- Rich chocolate flavor paired with creamy peanut butter
- Easy to prepare and perfect for any occasion
- A delightful treat that satisfies all ages
Choosing the Right Ice Cream
When selecting ice cream for your Luscious Reese's Ice Cream Cake, it's crucial to choose high-quality brands for the best flavor and texture. Premium chocolate and peanut butter ice creams typically have richer flavors and creamier textures, enhancing your cake's overall experience. Look for options that emphasize natural ingredients like real cocoa and peanut butter, as these will contribute to a deeper, more indulgent taste.
It's also essential to let the ice cream soften slightly before layering. Leave it at room temperature for about 10-15 minutes. This will make it easier to scoop and spread without disturbing the crust. Just be careful not to let it melt too much, as overly soft ice cream can lead to a messy cake structure.
Perfecting the Crust
For a sturdy crust, ensure the crushed chocolate sandwich cookies are evenly mixed with melted butter. Press the mixture down firmly into the springform pan, using the flat bottom of a measuring cup or glass to compress it. The crust needs to be compact to hold everything together, especially when slicing through the cake later. Aim for a crust that’s about a half-inch thick for optimal durability.
If you're looking for a gluten-free option, swap the chocolate sandwich cookies for gluten-free chocolate cookies. This adjustment will maintain the flavor profile without compromising the cake's integrity, allowing everyone to enjoy a slice without worry. Just ensure the cookies you choose are of a similar texture to facilitate proper binding with the butter.
Serving and Storing Tips
Once you’ve pieced everything together, let the cake freeze overnight for the best results. This allows the flavors to meld beautifully, creating a cohesive dessert. However, if time is short, a minimum of 4 hours should set it adequately for slicing. When ready to serve, feel free to garnish with additional Reese's Pieces or a swirl of chocolate syrup, elevating its visually appealing layers.
To store leftovers, keep the cake covered tightly with plastic wrap or place it back in the freezer within the springform pan. This will prevent freezer burn and maintain its creamy texture. Ideally, consume the cake within a week for the best flavor. When serving again, let it sit at room temperature for about 10 minutes to soften slightly before slicing.
Ingredients
Gather these ingredients to create your Luscious Reese's Ice Cream Cake.
Ingredients
- 16 chocolate sandwich cookies, crushed
- 4 tablespoons unsalted butter, melted
- 1 quart chocolate ice cream, softened
- 1 quart peanut butter ice cream, softened
- 1 cup mini Reese's Pieces
- 1 cup whipped cream, for topping
- Chocolate syrup, for drizzling
Once you have these ingredients ready, you're all set to make this delicious cake!
Instructions
Follow these steps to assemble your Luscious Reese's Ice Cream Cake.
Prepare the crust
In a medium bowl, combine the crushed chocolate sandwich cookies and melted butter. Mix until the crumbs are evenly coated. Press this mixture firmly into the bottom of a 9-inch springform pan to form the crust.
Layer the ice cream
Scoop half of the softened chocolate ice cream onto the crust and spread it into an even layer. Next, spoon the peanut butter ice cream on top, spreading it evenly to fill the pan. Freeze for about 2 hours or until firm.
Add toppings
Once the ice cream layers are set, remove the cake from the freezer. Spread the whipped cream over the top and sprinkle with mini Reese's Pieces. Drizzle with chocolate syrup for an extra treat.
Slice and serve
Carefully remove the sides of the springform pan. Slice the cake into wedges and serve immediately for a deliciously sweet experience.
Enjoy your homemade Luscious Reese's Ice Cream Cake!
Pro Tips
- For an even richer flavor, try adding crushed peanuts on top along with the mini Reese's Pieces. This will provide a satisfying crunch that pairs nicely with the creamy texture.
Variations to Try
If you want to switch things up, consider using different flavors of ice cream. Cookies and cream or vanilla ice cream can add an interesting twist while still pairing well with the chocolate cookies and peanut butter. Additionally, incorporating chunks of real Reese's Peanut Butter Cups between the layers can provide a delightful surprise in each slice, enhancing the overall peanut butter flavor throughout the dish.
For a more decadent experience, add a layer of fudge or caramel sauce between the ice cream layers. Just ensure the sauce is not too hot, as this would soften the ice cream excessively. Drizzle it evenly to create layers of flavor that play beautifully against the nutty and chocolatey base.
Troubleshooting Common Issues
One common issue with ice cream cakes is the potential for cracks when cutting into the cake. This can happen if the ice cream layers weren't allowed to fully set. If you notice cracks forming, allow the cake to soften slightly before slicing; this should make cutting smoother. Alternatively, a sharp knife dipped in warm water can help create cleaner cuts.
Another consideration is if your cake feels too soft after freezing. Make sure you allow each layer to freeze sufficiently before adding the next layer. If you’re in a humid environment or your freezer isn’t cold enough, it may take longer for the cake to set firm. Always use a good ice cream scoop to ensure portioning is easier.
Make-Ahead Options
This ice cream cake is perfect for making ahead of time, allowing you to enjoy your gathering without the stress of last-minute prep. Prepare the entire cake up to a week in advance, then simply cover and freeze it. The crust will hold up well, and the flavors will have even more time to develop, resulting in a richer experience when served.
You can also prepare the crust a day ahead and freeze it separately. Once ready to assemble, just add the softened ice creams and finish off with the whipped cream and toppings. This approach gives the crust an extra chance to set before being layered with the ice cream, preventing any sogginess from forming.
Questions About Recipes
→ Can I use homemade ice cream instead?
Absolutely! Homemade chocolate and peanut butter ice creams will enhance the flavors even more.
→ How long can I store the cake in the freezer?
You can store the cake in the freezer for up to 1 month. Just ensure it is well covered to prevent freezer burn.
→ Can I substitute the chocolate cookie crust?
Yes! You can use graham cracker crumbs or even brownies as a base for a different flavor profile.
→ What if I don’t have a springform pan?
You can use a regular cake pan, but cutting and serving the cake may be a bit trickier; just line it with parchment paper for easier removal.
Luscious Reese's Ice Cream Cake
Created by: The Whiskwonderfood Team
Recipe Type: Creative Sweet Recipe Ideas
Skill Level: Easy
Final Quantity: 8 servings
What You'll Need
Ingredients
- 16 chocolate sandwich cookies, crushed
- 4 tablespoons unsalted butter, melted
- 1 quart chocolate ice cream, softened
- 1 quart peanut butter ice cream, softened
- 1 cup mini Reese's Pieces
- 1 cup whipped cream, for topping
- Chocolate syrup, for drizzling
How-To Steps
In a medium bowl, combine the crushed chocolate sandwich cookies and melted butter. Mix until the crumbs are evenly coated. Press this mixture firmly into the bottom of a 9-inch springform pan to form the crust.
Scoop half of the softened chocolate ice cream onto the crust and spread it into an even layer. Next, spoon the peanut butter ice cream on top, spreading it evenly to fill the pan. Freeze for about 2 hours or until firm.
Once the ice cream layers are set, remove the cake from the freezer. Spread the whipped cream over the top and sprinkle with mini Reese's Pieces. Drizzle with chocolate syrup for an extra treat.
Carefully remove the sides of the springform pan. Slice the cake into wedges and serve immediately for a deliciously sweet experience.
Extra Tips
- For an even richer flavor, try adding crushed peanuts on top along with the mini Reese's Pieces. This will provide a satisfying crunch that pairs nicely with the creamy texture.
Nutritional Breakdown (Per Serving)
- Calories: 380 kcal
- Total Fat: 26g
- Saturated Fat: 15g
- Cholesterol: 195mg
- Sodium: 85mg
- Total Carbohydrates: 32g
- Dietary Fiber: 3g
- Sugars: 24g
- Protein: 6g